Free Asian Recipes, Asian Cuisines, Asian Food, Asian Recipe, Asian Cooking Guide and Online Recipes from all over Asian Home Free Asian Recipes, Famous Asia Recipe, Asia Food, Asian Cuisines, Asian Food Recipes, Asian Recipe, Asian Cooking Guide and Asian Online Recipes from all
Estimated cooking time for this chicken recipe: 1.5 hours
Ingredients:
*One 1 1/2 kilo chicken, cut in pieces
*One can (14 ounces) Vienna sausage, sliced
*3 potatoes, diced
*1 carrot, diced
*1 up mushrooms, cut in half
*1 green bell pepper, sliced in strips
*1/2 cup sweet peas
*1 onion, minced
*1/4 cup grated cheese
*1 cup margarine
*2 cups chicken stock (broth)
*1/2 cup evaporated milk
*4 tablespoons soy sauce
*1 lemon extract (juice)
*1 egg, beaten
*Salt and pepper to taste
Pie Crust
*2 cups flour
*1/2 cup corn oil or vegetable oil
*1 teaspoon salt
*1/4 cup of water
Cooking Procedures:
*In a bowl, marinate chicken lemon juice and soy sauce for an hour.
*In a skillet, melt margarine and brown chicken, set aside.
*Sauté onion, bell pepper an mushrooms then add chicken broth. Simmer for 15 minutes then add potatoes, carrots, sweet peas, sausages, grated cheese and milk. Continue cooking for 10 minutes. Salt to taste.
*Transfer to a baking dish.
*Pre-heat oven to 450 degrees Fahrenheit.
*On a bowl, combine the flour, salt, cold water and oil. Mix into a ball.
*On a flat surface, roll flat the pastry and cover the chicken pastel mixture and seal the sides by pressing on the edges. Remove excess pastry.
*Punch small holes on the pastry to let out steam during baking then brush with beaten egg.
*Bake until golden brown (about 15 minutes).
*1 1/2 kilo chicken, cut into pieces
* 1/4 cup of white vinegar
*5 cloves of garlic, crushed
*1 cup of water
*2 cups cooking oil
*Salt and pepper to taste
Procedures :
*In a pot, simmer chicken in vinegar, garlic, water, salt and pepper.
*Remove just before the chicken is fully cooked.
*Strain off liquid.
*In a frying pan or wok, heat oil and deep fry the chicken until golden brown
*Place on paper towel to remove excess oil
*Serve hot with rice and sliced cucumber or atchara on the side.
* 4 large sliced sword fish
* ½ lemon
* 6 tbsp Olive oil
* 1 tbsp of finely chopped mixed fresh herbs
* Freshly ground rock salt and black pepper
Procedure:
1. Squeeze the juice from the lemon
2. Blend the juice and olive oil well with a little hand whisk
3. Add the herbs and a good twist of freshly ground salt and pepper to taste
4. Stir well
5. Wash the swordfish steaks and place in a dish
6. Pour the marinade over the fish, cover with cling film or foil and pop the dish into the fridge to marinade for four to five hours
7. When the steaks have finished marinating, remove them from the marinade and grill or barbecue for five to eight minutes each side, basting well and often with the marinade
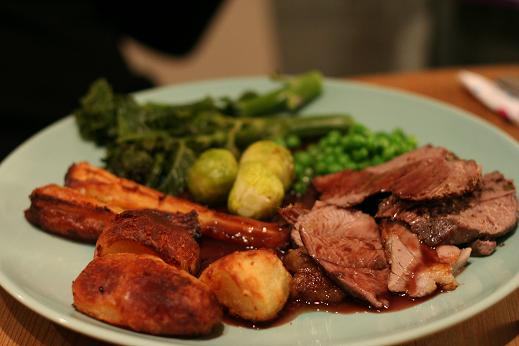
- 1.8 kg leg of lamb
- 1/4 cup olive oil
- Freshly ground black pepper
- 2 cloves garlic, peeled and thinly sliced (optional)
- 6 unwashed potatoes, peeled and quartered
- 1 kg butternut pumpkin, chopped and seeds removed, or 1 kg kumara (sweet potatoes), peeled and cut into large chunks
- salt
- 1 tablespoon plain flour
- 1 1/2 cups beef stock
- 400 g green beans, topped and tailed, boiled, to serve
- 4 small carrots, peeled and thickly sliced on the diagonal, boiled, to serve
How to cook
1 Preheat the oven to 220°C. Place the lamb in a large roasting pan and brush it all over with a little of the oil. Season well with pepper. If you are using the garlic, make 1-cm-deep slits with a small, sharp knife in the leg of lamb, and press a piece of garlic into each slit with your fingers. Roast the lamb in the preheated oven for 15 minutes, then reduce the oven temperature to 180°C.
2 Meanwhile, place the potatoes and pumpkin or kumara on a board and brush with the remaining oil. Season with salt and pepper. Arrange the potatoes around the lamb and roast the lamb and potatoes for 30 minutes. Add the pumpkin or kumara to the roasting pan and roast for a further 40 minutes (for medium-cooked lamb). Transfer the lamb to a carving plate, cover loosely with foil and set aside to rest. Transfer the vegetables to a large well-greased roasting pan. Increase the oven temperature to 230°C and return them to the oven for 10 minutes to crisp up.
3 For the gravy, skim off all but about 2 tablespoons of the fat from the juices remaining in the roasting pan. Place the pan on the stove over medium heat. Add the flour and cook, stirring with a wooden spoon and scraping the base of the pan to loosen any crisp bits, for 1–2 minutes, or until the flour just starts to brown. Gradually stir in the stock until well combined. Increase the heat to high and bring to the boil. Reduce the heat to medium-high and boil, uncovered, for 5 minutes, or until the gravy thickens.
4 Carve the lamb and serve with the pumpkin or kumara, potatoes, carrots, beans and gravy.
* 2 tablespoons olive oil, plus 1/4 cup, plus 2 tablespoons
* 1 medium onion, finely chopped
* 4 cloves garlic, crushed, plus 1 teaspoon minced garlic, plus 2 cloves garlic, minced
* 1 teaspoon dried oregano
* 1 teaspoon dried basil
* 1 teaspoon dried parsley
* 24 ounces canned crushed tomatoes
* 1/4 teaspoon salt
* 1/2 teaspoon dried thyme
* 2 medium zucchini, cut lengthwise into 1/4-inch thick slices
* 1 eggplant, cut into bite-sized pieces
* 1 medium yellow squash, cut into bite-sized pieces
* 1 cup button mushrooms, sliced 1/4-inch thick
* 2 portobello mushroom, sliced 1/4-inch thick
* 1/2 cup low-fat ricotta cheese
* 1 cup reduced-fat shredded mozzarella cheese
* 1/2 cup grated Parmesan
Directions:
Preheat oven to 350 degrees F.
Prepare tomato sauce: Heat 2 tablespoons olive oil in a non-stick saucepan over medium heat. Add chopped onion and saute until soft and translucent, about 5 minutes. Add 4 cloves crushed garlic and saute until fragrant, about 1 minute. Add dried oregano, basil, and parsley and stir. Add crushed tomatoes and salt and simmer until thickened, about 15 minutes.
Meanwhile, in a small bowl, mix together 1/4 cup olive oil, 1 teaspoon minced garlic, and dried thyme. Place zucchini on a sheet pan and brush with olive oil mixture. Bake until soft, about 5 minutes. Remove from the oven and set aside. Marinate the eggplant and yellow squash in the remaining olive oil mixture for a few minutes.
Heat 2 tablespoons olive oil in a non-stick skillet over medium heat. Add 2 cloves minced garlic and saute until fragrant. Add sliced button mushrooms and saute until tender. Set aside. Meanwhile, place marinated vegetables in a roasting pan and roast in the oven for 10 minutes.
Line the bottom of a casserole dish with the baked zucchini slices. Add half of the eggplant and squash mixture. Top with half of the tomato sauce and then spread the ricotta cheese over. Arrange portobello slices over top and then sprinkle with half of the mozzarella. Top with the sauteed mushroom mixture. Top with remaining eggplant and squash mixture. Spread remaining tomato sauce over top. Sprinkle with remaining mozzarella and all of the Parmesan. Bake until the cheese is melted and brown, about 40 minutes. Let stand for 5 minutes before cutting into and serving.
* 5 chicken drumettes shopping list
* 1 tsp minced ginger shopping list
* 1 cube fermented red beancurd, mashed ( optional, all-purpose cajun seasoning is great too ) shopping list
* 1 egg white shopping list
* 1 egg yolk shopping list
* shaoxing wine ( OR other chinese cooking wine ) shopping list
* ground black pepper shopping list
* salt and sugar to taste shopping list
* cornflour shopping list
* panko breadcrumbs
How to make it
* With a knife, pull and scrape the meat off the top to the bottom of the chicken drumette.
* Marinate the chicken with minced ginger, mashed fermented red beancurd, egg white, black pepper, salt and sugar.
* Set the chicken in the refrigerator and let it marinate for about 10 minutes.
* Dip the chicken drumettes into the cornflour, then dip them into the egg yolk wash, and continue the same with the breadcrumbs.
* ( TIP : Quick chill in the freezer while the oil is heating up on the frying wok, to prevent breadcrumbs from falling off into the oil while frying )
* Deep fry the chicken drumettes on medium-high heat until golden brown.
2 large bunches fresh rosemary
1 large red onion, thinly sliced
1 (2- to 3-pound) salmon fillet with skin, 1 1/2-inches thick
2 large lemons thinly sliced
1/3 cup extra-virgin olive oil
Coarse salt and freshly ground black pepper
Preheat oven to 450 degrees F. Arrange half of rosemary sprigs in single layer in center of heavy baking sheet. Arrange sliced red onion on top of the rosemary.
Place salmon, skin side down, on the onion. Sprinkle with salt and pepper. Cover salmon with remaining rosemary sprigs.
Arrange lemon slices over rosemary. Drizzle olive oil over. Sprinkle lemon slices with salt. NOTE: Can be prepared 8 hours ahead, covered and refrigerated.
Bake, uncovered, 8 to 12 minutes or until a meat thermometer registers an internal temperature of 140 degrees F (salmon will be slightly opaque in thickest part). Remember the salmon continues to cook after it is removed from the heat source. Carefully remove salmon from pan and transfer onto individual serving plates. Serve with roasted onions and lemon slices.
Approximate cooking times for salmon:
1/4 to 1/3-inch - 3 to 4 minutes
1/2 to 3/4-inch - 4 to 6 minutes
1 to 1 1/2-inch - 8 to 12 minute
1. Cut and quality. First things first: you'll need to choose the cut of meat you'll be cooking.
* Types of steak] include tenderloin/filet (a top choice), sirloin strip, and rib eye.
* USDA meat grades go from Prime (top quality, mostly found in restaurants), to Choice (typically the highest grade you'll find at the butcher), to Select leaner and more easily dried out. There are lower grades, but you'll want to avoid them.
* Aged steak is less commonly found. It has a distinct flavor and the aging process can only be applied to the very best cuts of meat.
2. Marbling is a good thing. The more marbled the meat, the better.
* The marbling look comes from small flecks of fat that will mostly melt and keep the meat moist.
3. Thin is in. Thinner steaks are more easy to manage than thick ones.
* About 1½" thick is the ideal size (but anywhere from 1 - 2 inches should be fine).
* Filet mignon tends to be on the thicker side.
* If you can't find what you're looking for pre-packaged, simply ask the butcher to cut the meat to your liking.
4. Marinate if desired. Marinating can help tenderize tougher cuts of meat.
* Never marinate aged prime/choice beef or you will ruin it.
5. Thaw it out. You don't want to try cooking a frozen steak.
* For the best results, you'll want your steak to be about room temperature when you throw it on the grill.
6. Trim the fat. If desired, you may cut some of the large strips of fat from the edges of the steak.
* Ideally, fat strips should be no more than 1/4" thick.
7. Season to taste. Before cooking, season the steak with salt, pepper, and/or garlic.
* You'll also want to put some olive oil on each side before it hits the frying pan.
* Seasoning comes down to personal preference, as you can add as much or as little as you desire. Some people prefer not to put anything at all on their steak.
8. Don't poke holes! At no point in the process of cooking do you want to poke holes in your steak. This will only dry it out and make it lose flavor.
Step 2: Throw It on the Skillet
1. Grab yourself a heavy duty cast-iron, non-stick skillet and put a tablespoon of oil or butter in it.
2. Turn your stove on high and heat the skillet until it's piping hot. You'll probably need to turn on the fan so your kitchen doesn't fill up with smoke.
3. Put the steak in the skillet and leave it for about 3 minutes or so. The less you fidget with your steak during the cooking process, the better.
4. Flip it over using tongs (or a spatula, which isn't quite as easy). Never use a fork to flip... Remember that we don't want any holes poked in the meat.
5. If the steak is particularly thick, you may want to use the tongs to pick it up and sear the edges for up to a minute. Then place it back on the skillet on the side that needs more searing.
6. After a minute or two, you should have a rare to medium rare steak, which most people prefer. However, to determine exactly how done it is, move on to the next step.
Testing for Doneness
* You're now about ready to start testing the steak for doneness. This is the hardest part of cooking steak, and one that you'll need to practice a few times before you really master it. There are a few different methods you can use:
1. Cut it open. This is the least desirable option, since you want to serve your steaks fully intact, and any extra cooking you do after cutting the meat will dry it out more. However, it is a very simple way to see if the steak is cooked the way you'd like.
2. Use a meat thermometer. If you have one handy, stick it in the thickest part of the steak and use the temperature to determine how done it is. Keep in mind, piercing the meat will lose some of those juices.
* The FDA has these rules for meat temperatures:
* Medium Rare: 145°
* Medium: 160°
* Well Done: 170°
3. The touch method. This is the trickiest to master, but the only real way to preserve all of the flavor and precious juices. By pressing your finger (or a spoon) on the meat and feeling how firm it is, you can learn to determine how done the meat is without cutting it.
* The meat is hot! Don't burn your finger.
* The firmer the meat, the more it has been cooked.
* Compare the toughness of the meat to the fleshy part on the palm of your hand between the thumb and index finger. By touching your thumb to the tips of each of your fingers, you can achieve comparative toughness on your palm:
1. Thumb and index finger: Rare
2. Thumb and middle finger: Medium Rare
3. Thumb and ring finger: Medium
4. Thumb and pinky finger: Well Done
When They're Ready
* Now that you've cooked your steak to perfection, the time has come for the finishing touches.
1. Remove the steak from the heat and let it rest for 5 minutes, covering with aluminum foil if you prefer. This locks in the juices that make it tender.
2. Use this time to set the table or finish any side dishes you've been working on. Asparagus and potatoes both go well with steak!
3. Now to ask the final question: to flavor or not to flavor? Some people enjoy putting steak sauce, horseradish sauce, or other seasonings on their steak. Others simply prefer the juicy flavor of the steak itself. It's all up to you!
 Estimated cooking time for this chicken recipe: 1.5 hours